
This post comes with the guide to replace rear brake pad on the 2016 Mini Cooper S F55 using Launch X431 Pro V4.0.
Something to know about brake pads:
When to replace brake pads?
Here are a few common symptoms of worn-out brake pads:
1.Low brake pad warning light is on: Not all vehicles are equipped with this system, but if yours is, this dashboard indicator light will likely be the first signal it’s time to replace your brake pads.
2.Brakes start to squeal regularly: This is often one of the first signs of worn brake pads and is caused by a metallic piece built into brake pads for this exact purpose. This part contacts the brake rotor to make a squealing or whining noise when the pads are low.
3.Brakes make loud grinding noise: If not addressed early enough, your brake pads may get so worn that the metal backing plate of the pad grinds against the metal rotor.
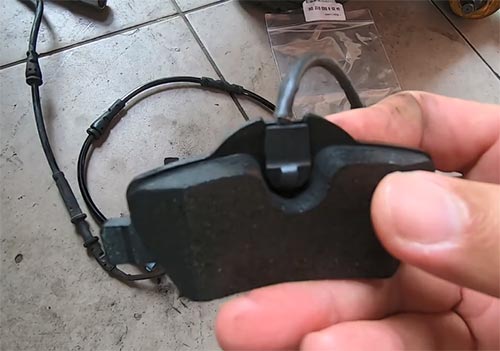
4.Brake pads look thin: You may be able to visually check your brake pad thickness to determine if they need replacement.
Can I drive with a brake problem?
It is not safe to operate any vehicle with a braking problem. If there is any sign that the brakes are not performing as originally intended, the vehicle should immediately be towed and repaired.
If the brake pads are being replaced as part of routine maintenance, with no symptoms noticed, the vehicle can safely be driven to a repair shop. Also, if the brake wear indicator has begun making noise, the vehicle can be driven to a repair facility, but postponing will result in unsafe driving conditions.
So how to replace brake pads with Launch X431 Pro?
Here will take Mini Cooper S F55 2016 as an example.
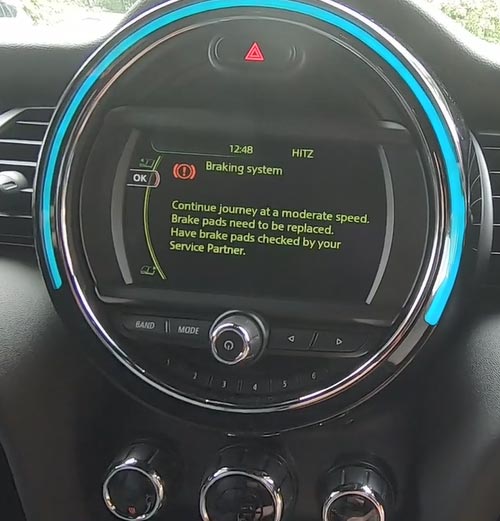
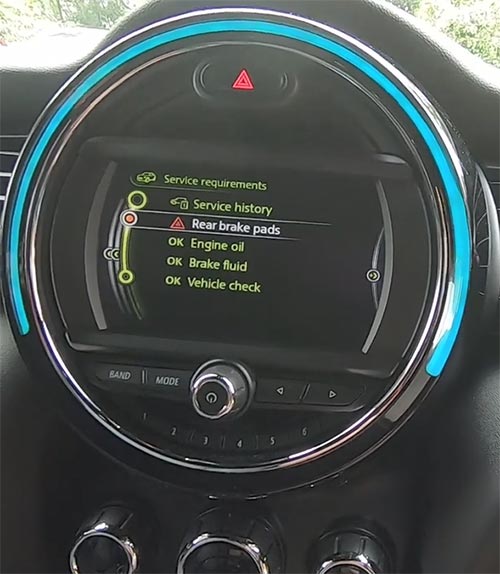
The low brake pad warning light appears on the dashboard and reminds to replace.
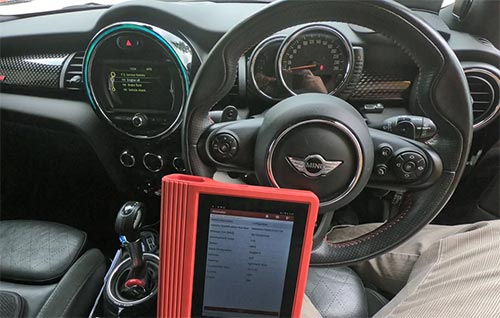
Now use Launch X431 V scan tool to diagnose the fault code firstly.
1.Enter X431 PRO menu
2.Select “Local Diagnose”-> “Mini”-> “Automatically Search”
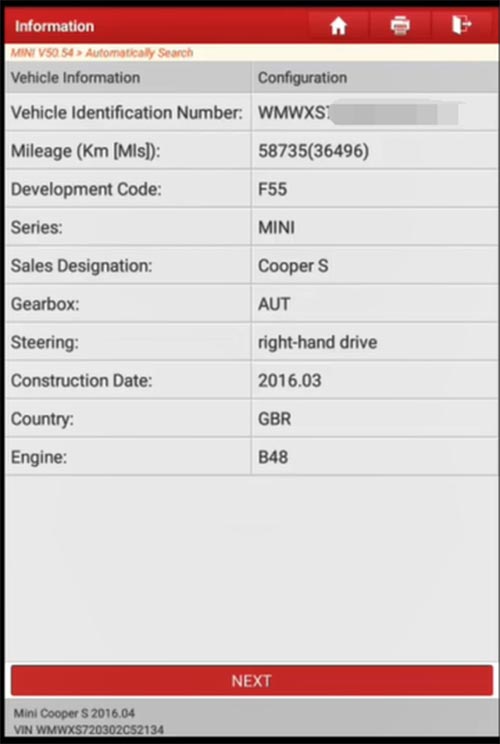
3.Detect out the related vehicle info
4.Select “Health Report” and read trouble code as below:
ABS (Anti-Lock Braking System-DSC): 1
480A12 Brake Pad Wear Sensor: Rear Axle, Replace Brake Pads Permanent

5.Then go to change the new brake pads
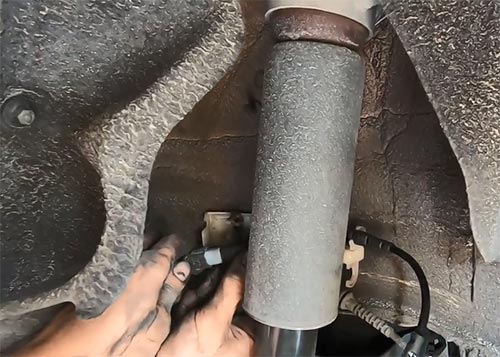
* Raise the car on a lift or jacks and jack stands
* Remove the wheels
* Remove the brake calipers. Brake pad replacement is done in pairs — both front wheels or both rear wheels at the same time, or all four
* Remove and check rotors. Resurface or replace as necessary
* Replace worn brake pads with a new set
* Replace rotors and calipers
* Replace wheels and torque bolts to specifications
Please kindly notice:
Replacing brake pads on your vehicle is a fairly straightforward procedure, and can be done at home. But because brakes are essential safety equipment, we strongly recommend having a certified repair shop perform this job.
6.Then clear the maintenance warning with X431 V 8 inch tablet
7.Select “Reset”-> “Brake Reset”-> “MINI”
8.Switch on ignition
9.Select “Automatic Scan”-> “Brake Maintenance”
Note: If the availability of Brake Pad Being Read Approaches 0%. Replace front and rear brake cable (front and rear brake pad sensors). Otherwise, service may fail.
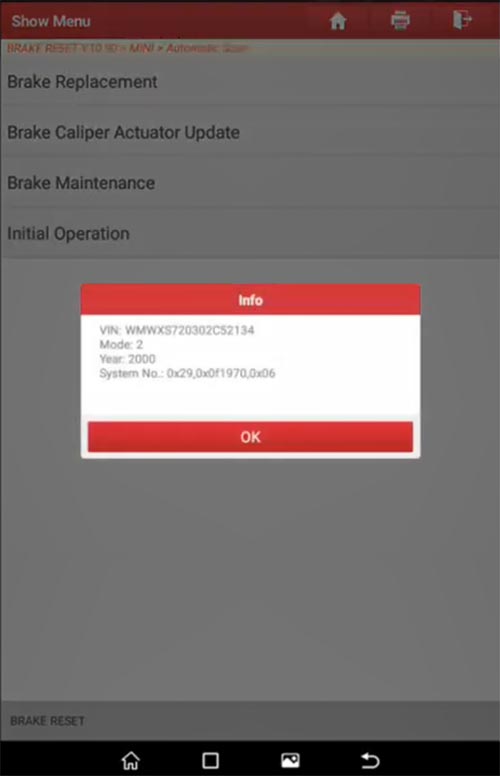
10.Read out the VIN, mode, car year and system No.
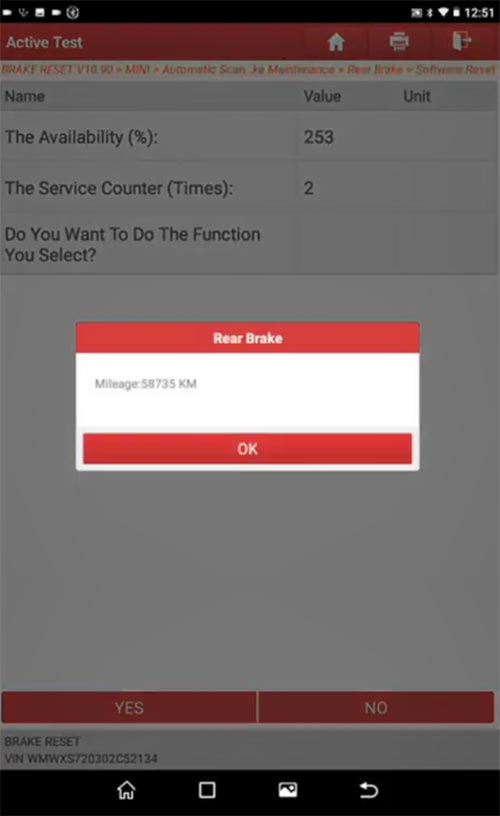
11.Select “Rear Brake”-> “Software Reset”
12.Read out the rear brake mileage
13.Clear all fault codes
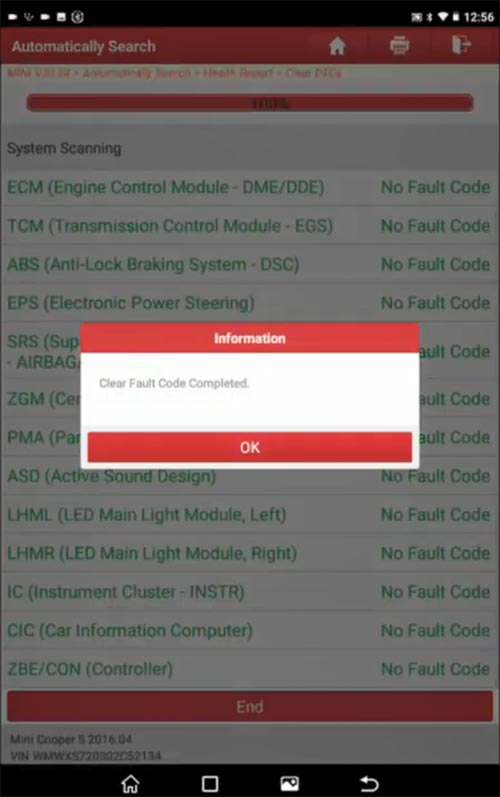
14.All warnings gone
