To perform a custom Tech 2 Scanner update to backdate the scan tool or install different language software:
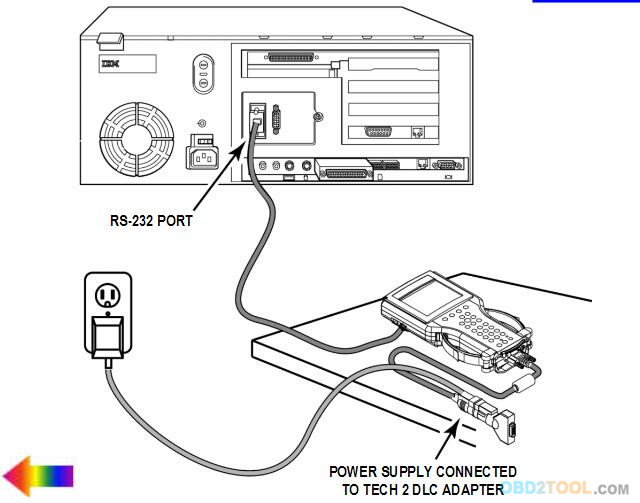
1. Connect the scan tool to the PC using the RS-232 cable (refer to the illustration in Figure 1).
2. Power up the scan tool using the AC power supply that came with the tool (refer to Figure 2).
3. At the PC, launch TIS.
4. From the TIS main screen, select Software Download.
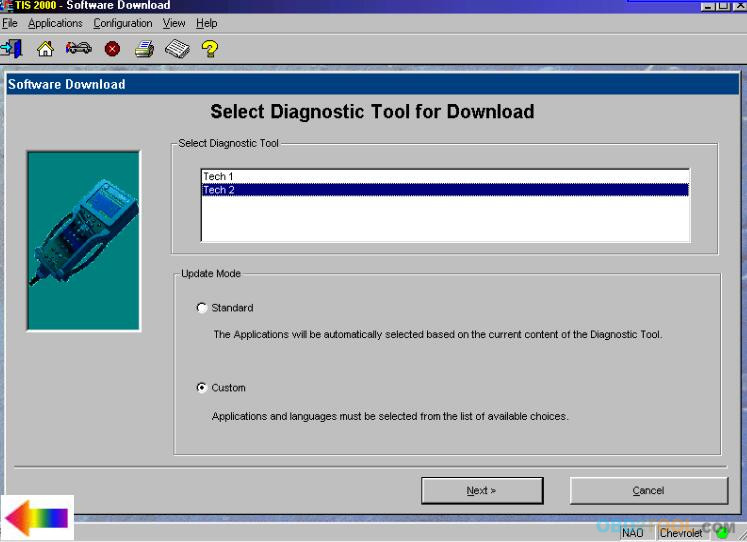
5. At the “Select Diagnostic Tool for Download” screen, select car diagnostic scanner Tech 2 and “Custom” (Figure 3) to allow backdating or installing of non-NAO software on the scan tool. After confirming the selection,select Next. A message will appear indicating the PC is reading the contents of the diagnostic tool.
6. A “Select the Applications” screen (Figure 4) appears. The left side of the screen lists software release numbers. Select the “+” sign to see the list of languages for each release (5).
7. Select the desired software version and language either by double-clicking on it or by highlighting the desired language file; then click Select in the middle of the screen. The selected software will appear in the right side of the screen (Figure 6). Click on the tabs to compare the current and selected scan tool software. Click Download to proceed.
8. A “Performing the Software Download” screen appears (Figure 7) to track the download status.
9. When the download is complete, a “Download Finished” screen appears (Figure 8). Click Close to close the application