And so, you came to your device, and you hold it in your hands. First of all, after you have made sure that it is intact, no need to go write a review or to complete the transaction, depending on where you bought it. Unpack Tech2 Scan Tool , the first thing we need to insert it in the Tech 2 memory card, no matter what the slot. To find the power supply from the network, plug rs232, as in the photo below, and the cover on the main cable.
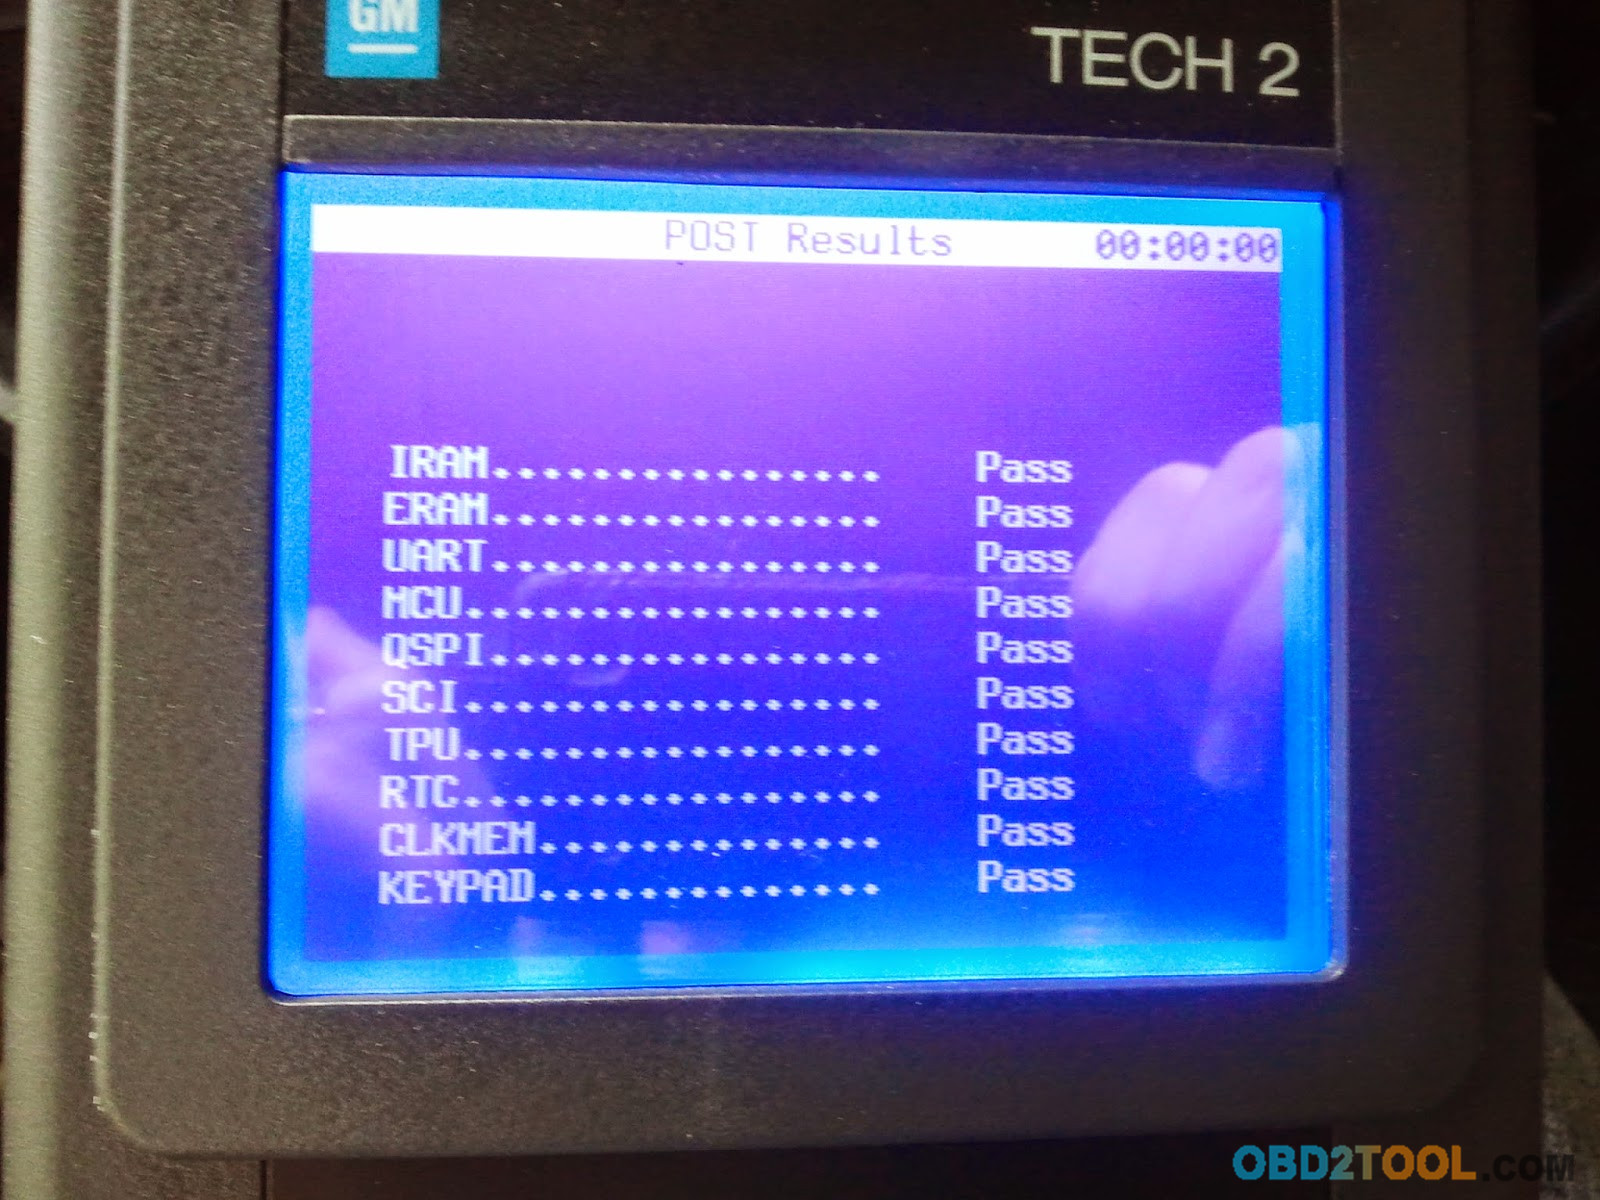
Now insert the plug GM 3000098 in the Tech 2 from Obd2tool.com , turn on the unit to the network and device connector is nearly blank. The first thing you will see is a POST test . Next to the menu and select tools options -> self test. Insert our rs232 plug and select Automaited test main board and VCI.
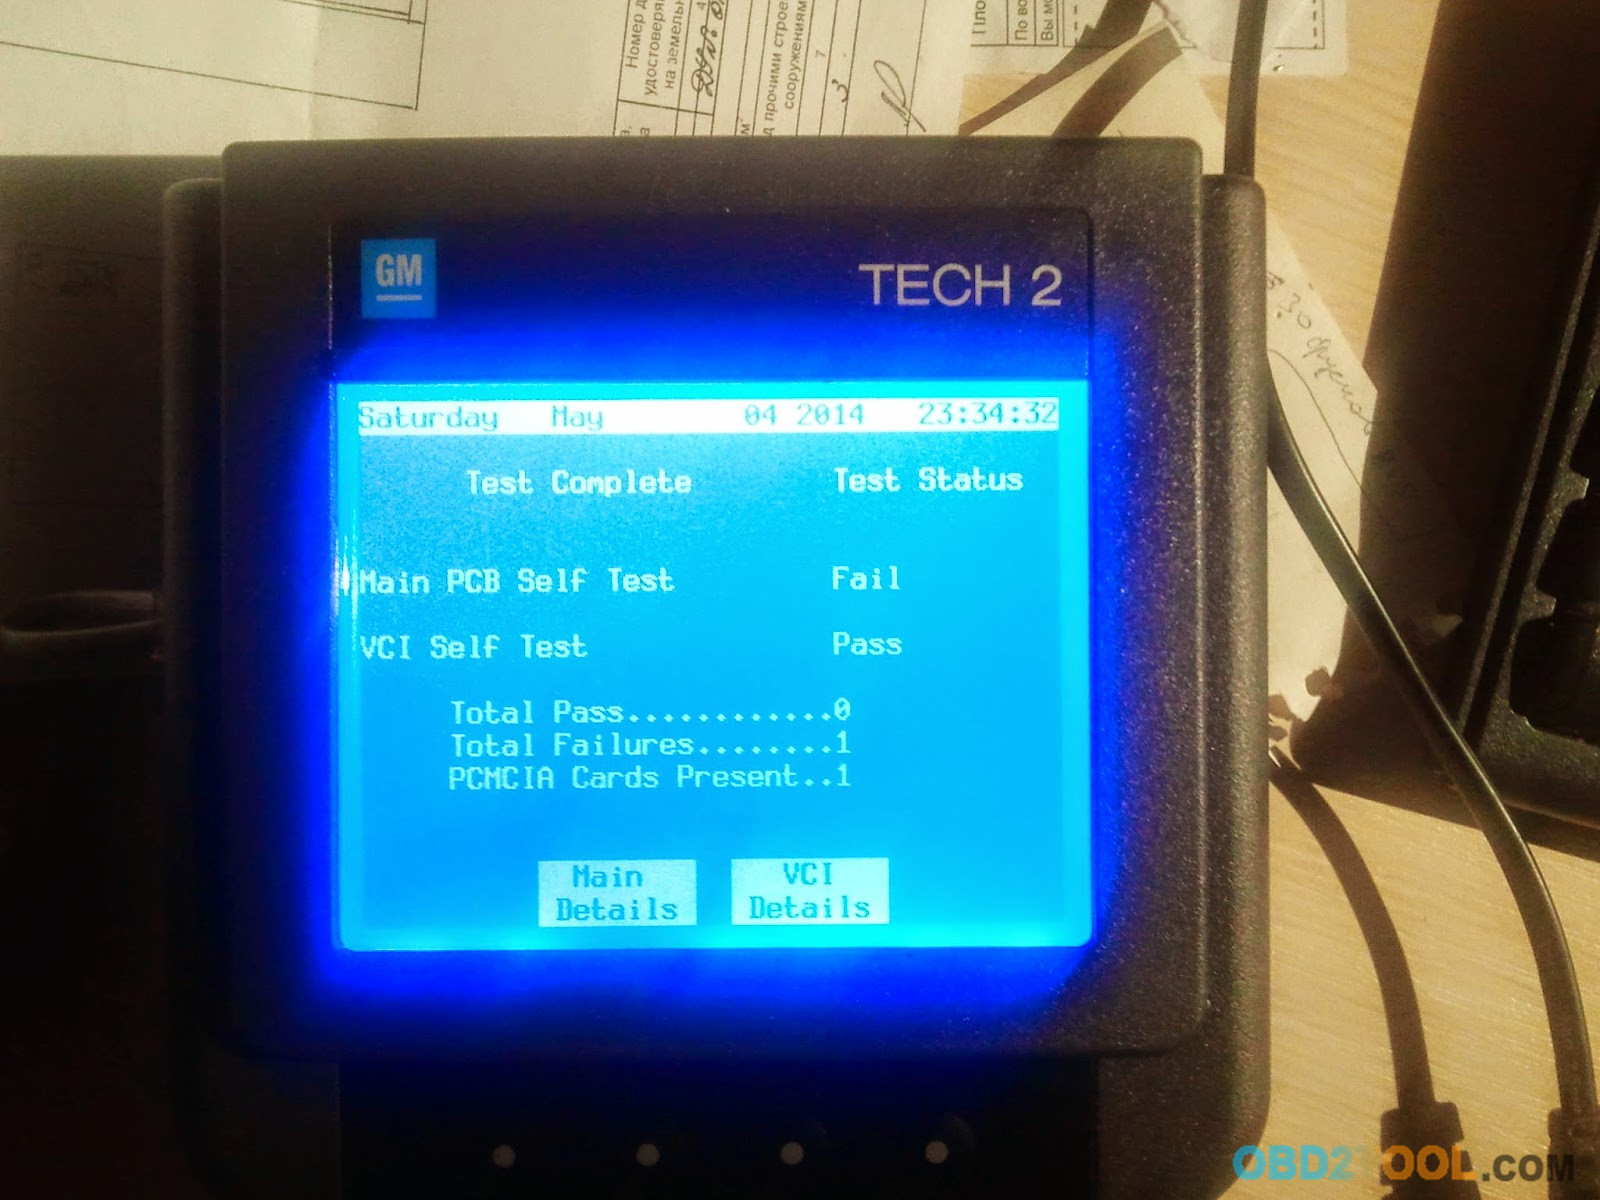
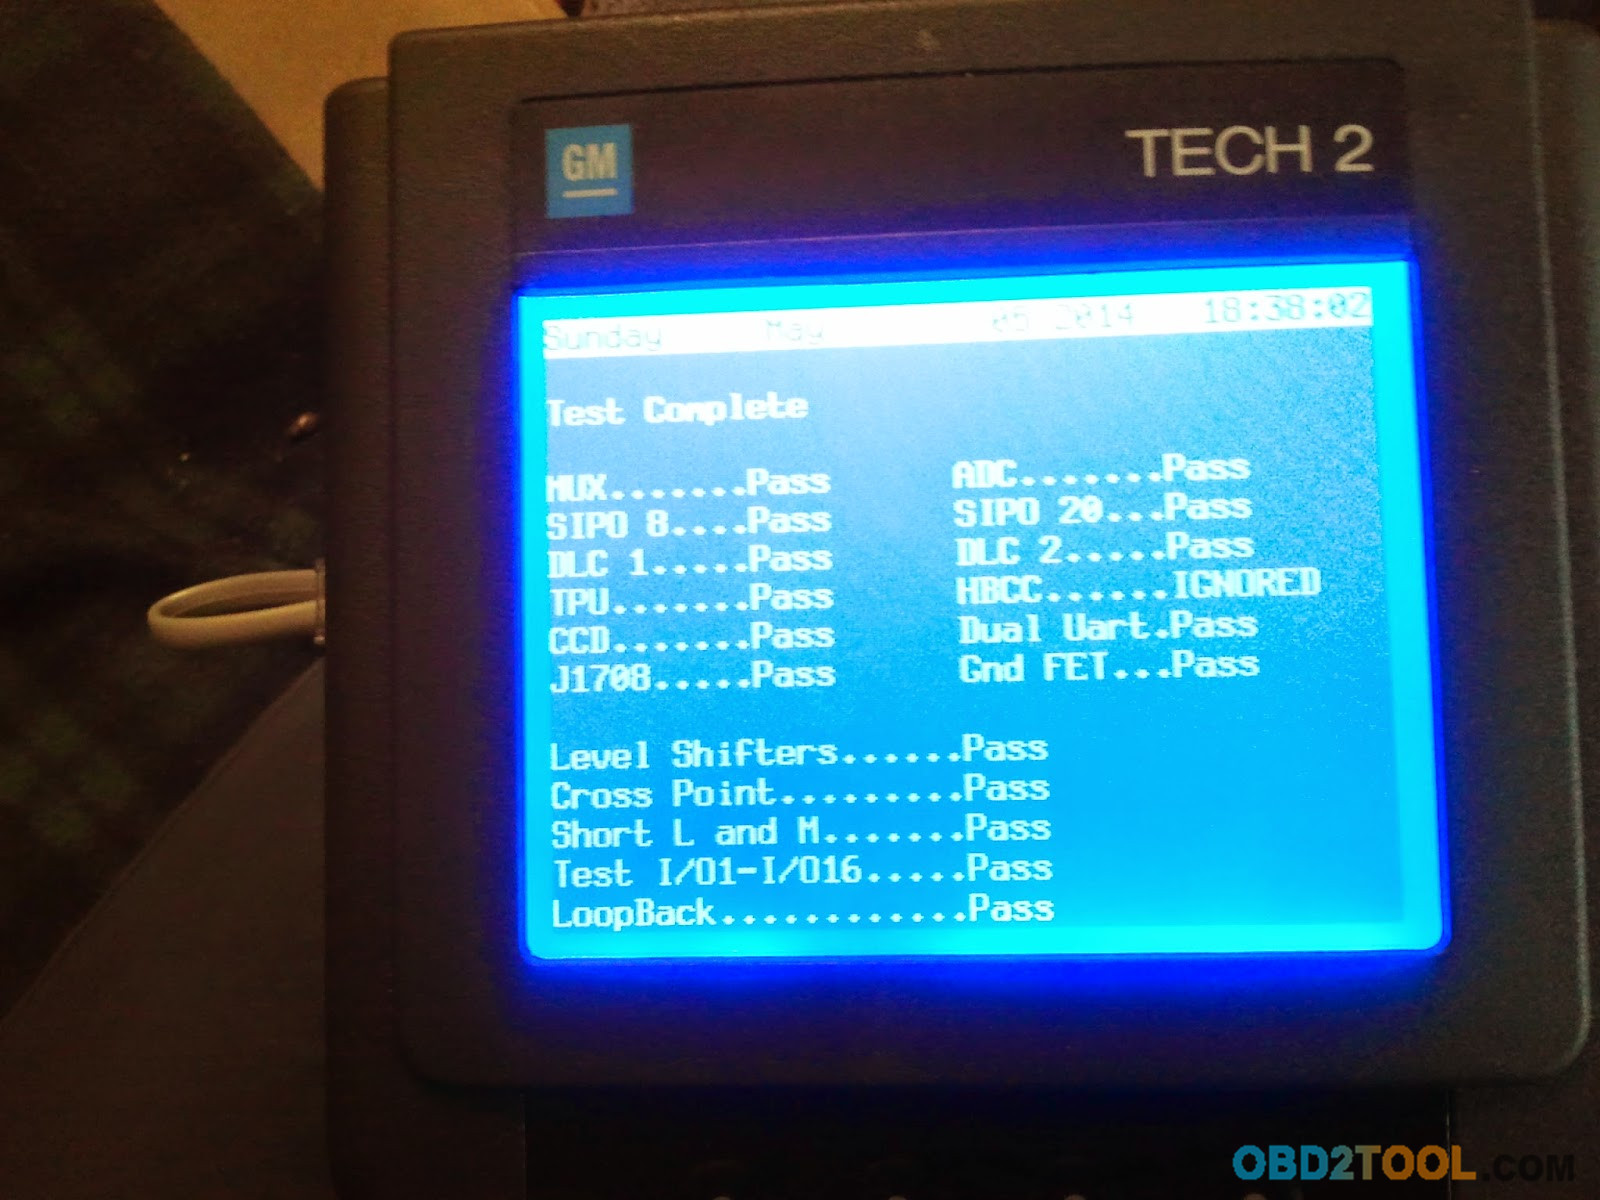
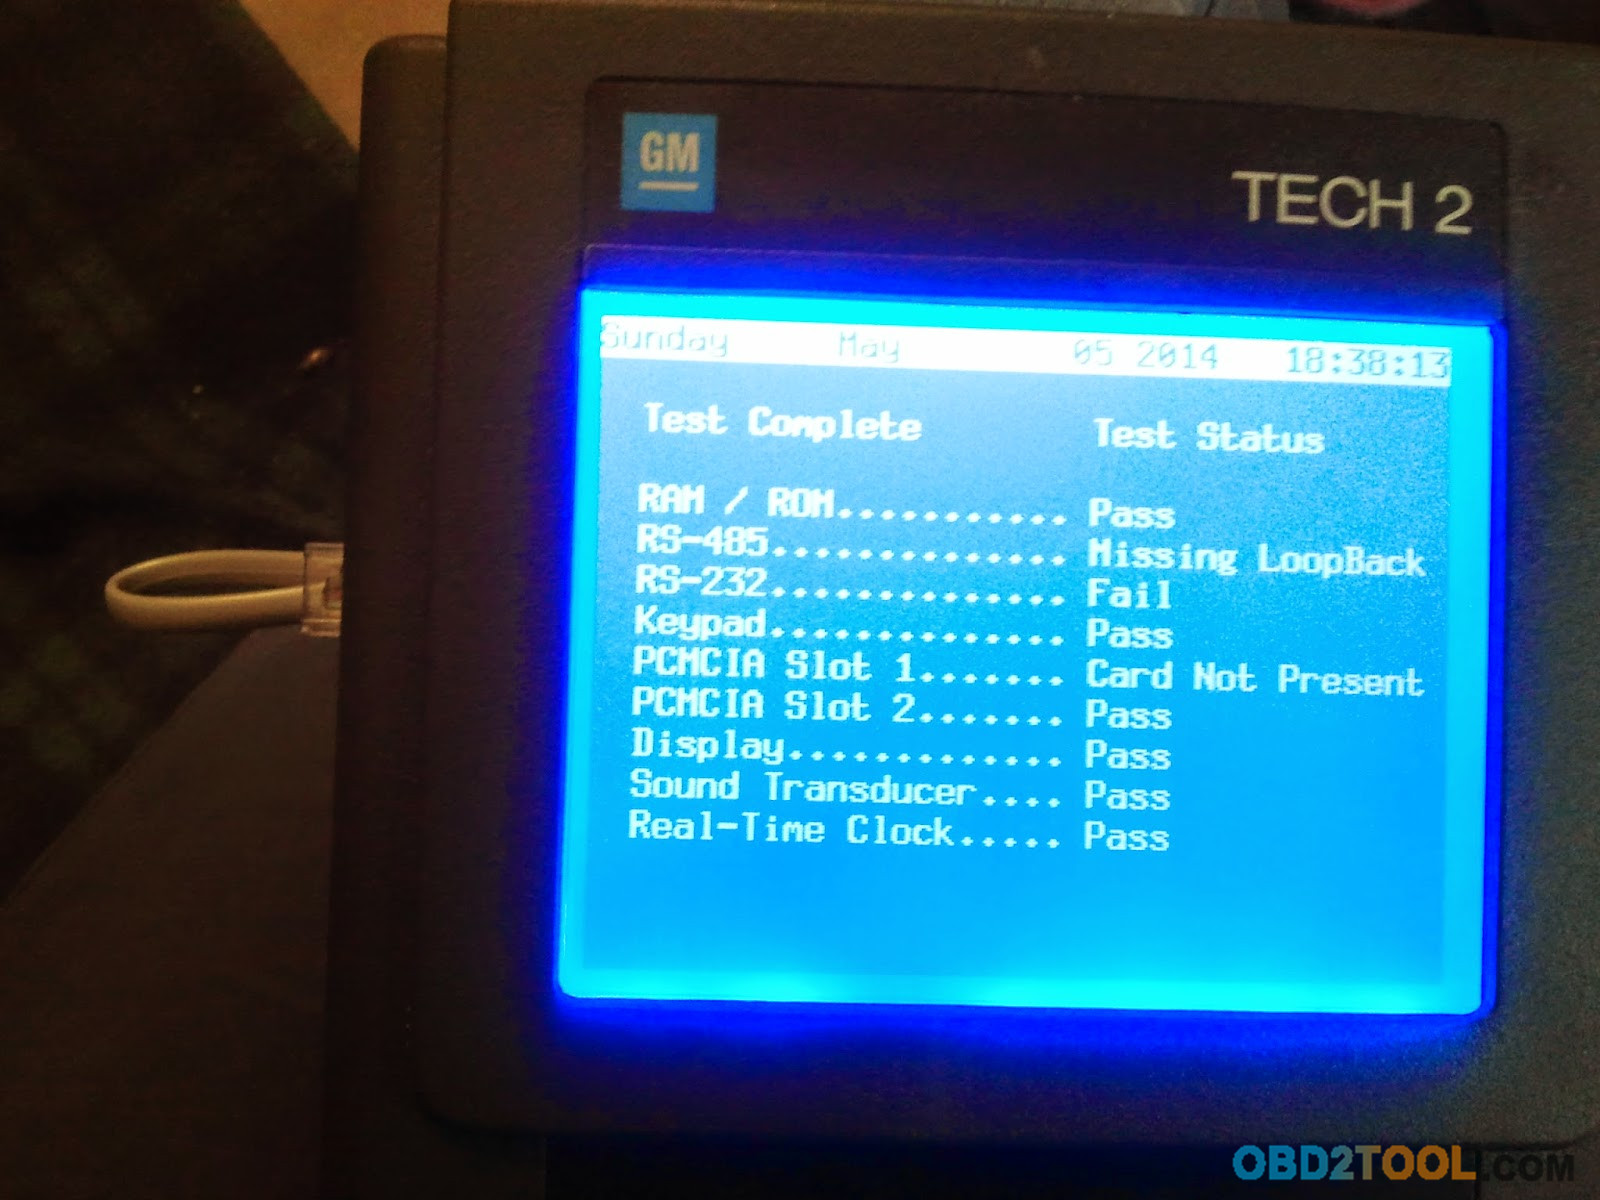
Here rs232 indicates that without our help, your GM Tech2 cannot communicate with the computer. Rs 485 nothing serious. But this is enough to Main PCB Self Test Fail. This isn’t a problem, because it is removed very simply, if errors are gone, and you still cannot connect to the computer, it is also just corrected. HBCC IGNORED’s OK too. But if mistakes will be much more, it is best to make sure you get the Tech 2 back, or you sent the new modules from him.
Next you need to test Candy , unfortunately I do not have a photo, but we havent nothing complicated, perhaps later I will make a short video like 5 minutes to test. Later I will try it’s clear to tell you how to resolve certain problems.